How to Set Up Goals and Conversions in GA4
Goals in Google Analytics 4 are called “conversions” — and they’re essential for measuring what matters on your website. This guide shows you how to set up conversion tracking from scratch.
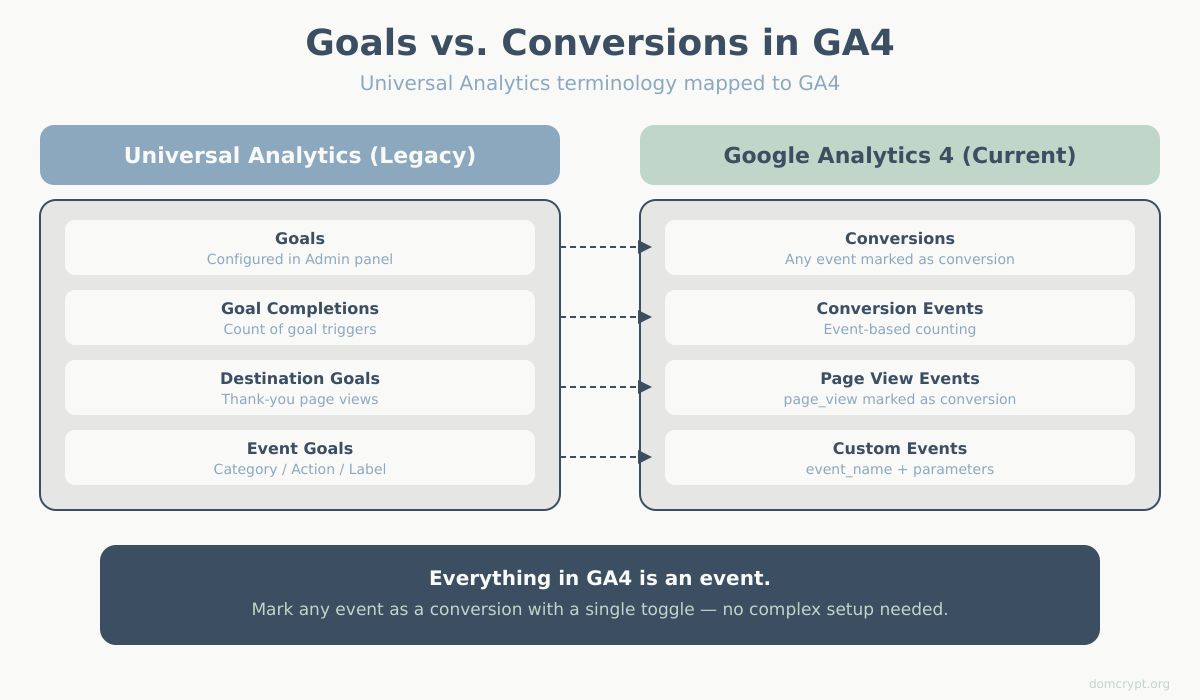
Goals vs. Conversions: What Changed in GA4
In Universal Analytics, you created “Goals” to track important actions. In GA4, the concept is similar but the terminology changed:
| Universal Analytics | Google Analytics 4 |
|---|---|
| Goals | Conversions |
| Goal completions | Conversion events |
| Destination goals | Page_view events marked as conversion |
| Event goals | Any event marked as conversion |
The good news: setting up conversions in GA4 is actually simpler than the old goal system.
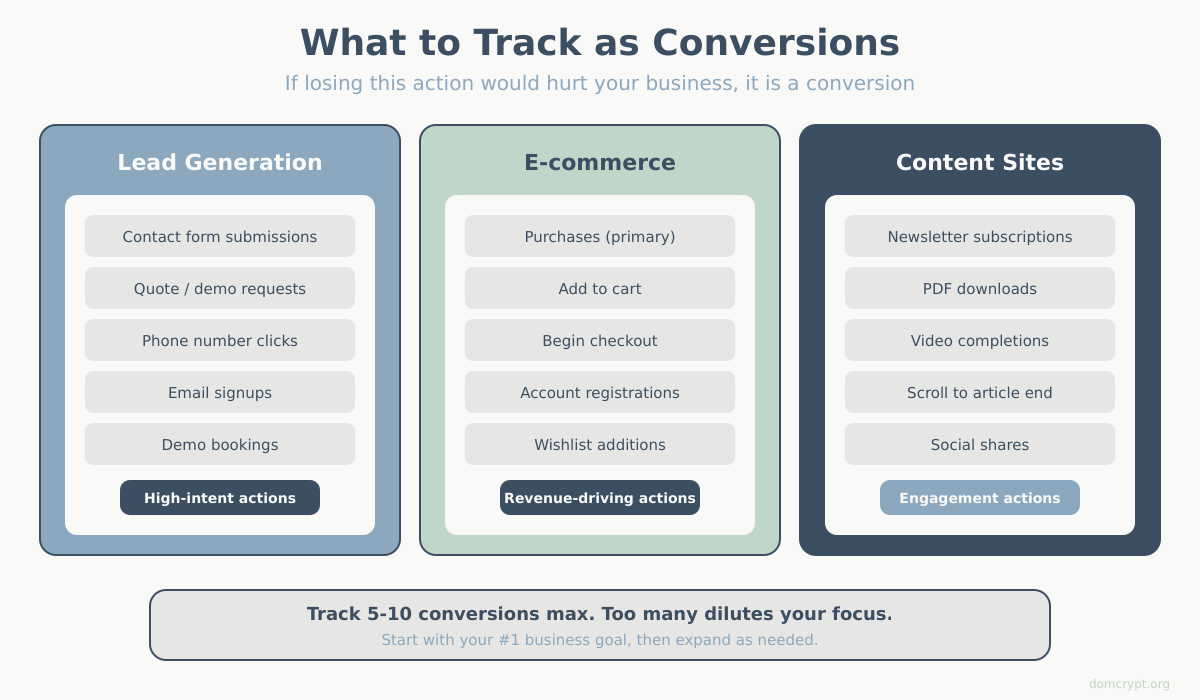
What Should You Track as Conversions?
Track actions that indicate business value:
Lead Generation Sites
- Contact form submissions
- Quote requests
- Phone number clicks
- Email signups
- Demo bookings
E-commerce Sites
- Purchases (most important)
- Add to cart
- Begin checkout
- Account registrations
Content Sites
- Newsletter subscriptions
- PDF downloads
- Video completions
- Scroll to article end
Rule of thumb: If losing this action would hurt your business, it’s probably a conversion. Not sure which metrics to prioritize alongside conversions? See our guide to the key website metrics that actually matter.
Method 1: Mark Existing Events as Conversions
GA4 automatically tracks some events. You can mark any of them as conversions.
Steps:
- Go to Admin → Events
- Find the event you want to track (e.g., “file_download”)
- Toggle Mark as conversion to ON
That’s it. The event now appears in your Conversions reports.
Pre-existing Events You Might Mark:
- file_download — PDF, doc downloads
- click — with filters for specific buttons
- scroll — 90% page scroll
- video_complete — YouTube video finished
- form_submit — if forms are being tracked
Method 2: Create New Events in GA4
When the action you want to track isn’t already an event, create one.
Example: Track Thank-You Page Views
- Go to Admin → Events
- Click Create event
- Click Create
- Enter event name: form_submission_complete
- Set matching conditions:
- Parameter: event_name equals page_view
- AND Parameter: page_location contains /thank-you
- Click Create
Now go to Admin → Conversions and mark this new event as a conversion.
Example: Track Button Clicks
- Go to Admin → Events → Create event
- Event name: cta_button_click
- Conditions:
- Parameter: event_name equals click
- AND Parameter: link_text contains Get Started
- Create and mark as conversion
Method 3: Use Google Tag Manager
For more complex tracking, Google Tag Manager offers more flexibility.

Track Form Submissions via GTM
- In GTM, go to Triggers → New
- Select Form Submission
- Configure:
- Wait for Tags: checked
- Check Validation: checked
- Enable on: Some Forms
- Condition: Form ID equals “contact-form”
- Save trigger
- Go to Tags → New
- Select GA4 Event
- Configuration Tag: your GA4 config
- Event Name: generate_lead
- Trigger: the form submission trigger you created
- Save and publish
In GA4, go to Admin → Conversions → New conversion event and add “generate_lead”.
Setting Conversion Values
Assign monetary values to conversions for ROI calculations.
In GA4 Interface
- Go to Admin → Events
- Click your conversion event
- Click Modify event
- Add parameter modification:
- Parameter: value
- New value: your amount (e.g., 50)
- Add: currency = USD (or your currency)
- Save
Via GTM (Dynamic Values)
For e-commerce, pass the actual purchase value:
- In your GA4 Event tag, add parameters:
- value: {{Purchase Value Variable}}
- currency: {{Currency Variable}}
- Create variables to pull these from your dataLayer
Verify Conversions Are Working
Method 1: DebugView
- Install Google Analytics Debugger extension
- Enable it and visit your site
- Trigger the conversion action
- In GA4, go to Admin → DebugView
- Look for your event with a flag icon (indicates conversion)
Method 2: Realtime Report
- Go to Reports → Realtime
- Scroll to Conversions by Event name
- Trigger the conversion on your site
- Watch for it to appear (may take 30 seconds)
Method 3: Wait for Data
Conversion data in standard reports can take 24-48 hours. Check the Conversions report after waiting.
Recommended Conversions by Business Type
SaaS / Software
- sign_up (account creation)
- begin_trial
- purchase / subscribe
- feature_activation
E-commerce
- purchase (required)
- add_to_cart
- begin_checkout
- add_payment_info
Lead Generation
- generate_lead (form submission)
- schedule_appointment
- click_to_call
- download_resource
Publisher / Content
- newsletter_signup
- article_complete (scroll-based)
- video_complete
- share
Common Mistakes to Avoid
Too Many Conversions
If everything is a conversion, nothing is. Limit to 5-10 meaningful actions. Use regular events for less critical tracking.
Duplicate Tracking
Don’t track the same action multiple ways (both page view of /thank-you AND form submit event). Pick one method.
Not Testing
Always verify conversions work using DebugView before assuming they’re tracking correctly.
Missing Cross-Domain
If your checkout is on a subdomain or different domain, configure cross-domain tracking or conversions won’t attribute correctly.
View Conversion Reports
Once conversions are set up and data is flowing:
- Go to Reports → Engagement → Conversions
- See all conversions over time
- Click any conversion to see:
- Traffic sources driving conversions
- Pages where conversions happen
- User demographics
Use Advertising → Attribution to see which channels contribute to conversions across the customer journey. To understand how different attribution models assign credit across touchpoints, check our detailed guide.
Summary
Setting up conversions in GA4 involves three approaches:
- Mark existing events — toggle any tracked event to be a conversion
- Create new events — build custom events for specific page views or actions
- Use GTM — for complex tracking like form submissions or custom interactions
Start with your most important business action (purchase, lead form, signup) and verify it’s tracking correctly before adding more. Quality matters more than quantity — a few well-configured conversions provide more value than dozens of poorly-tracked ones.
Once conversions are flowing, you’ll finally be able to answer the question that matters: “Is my website actually driving business results?”